
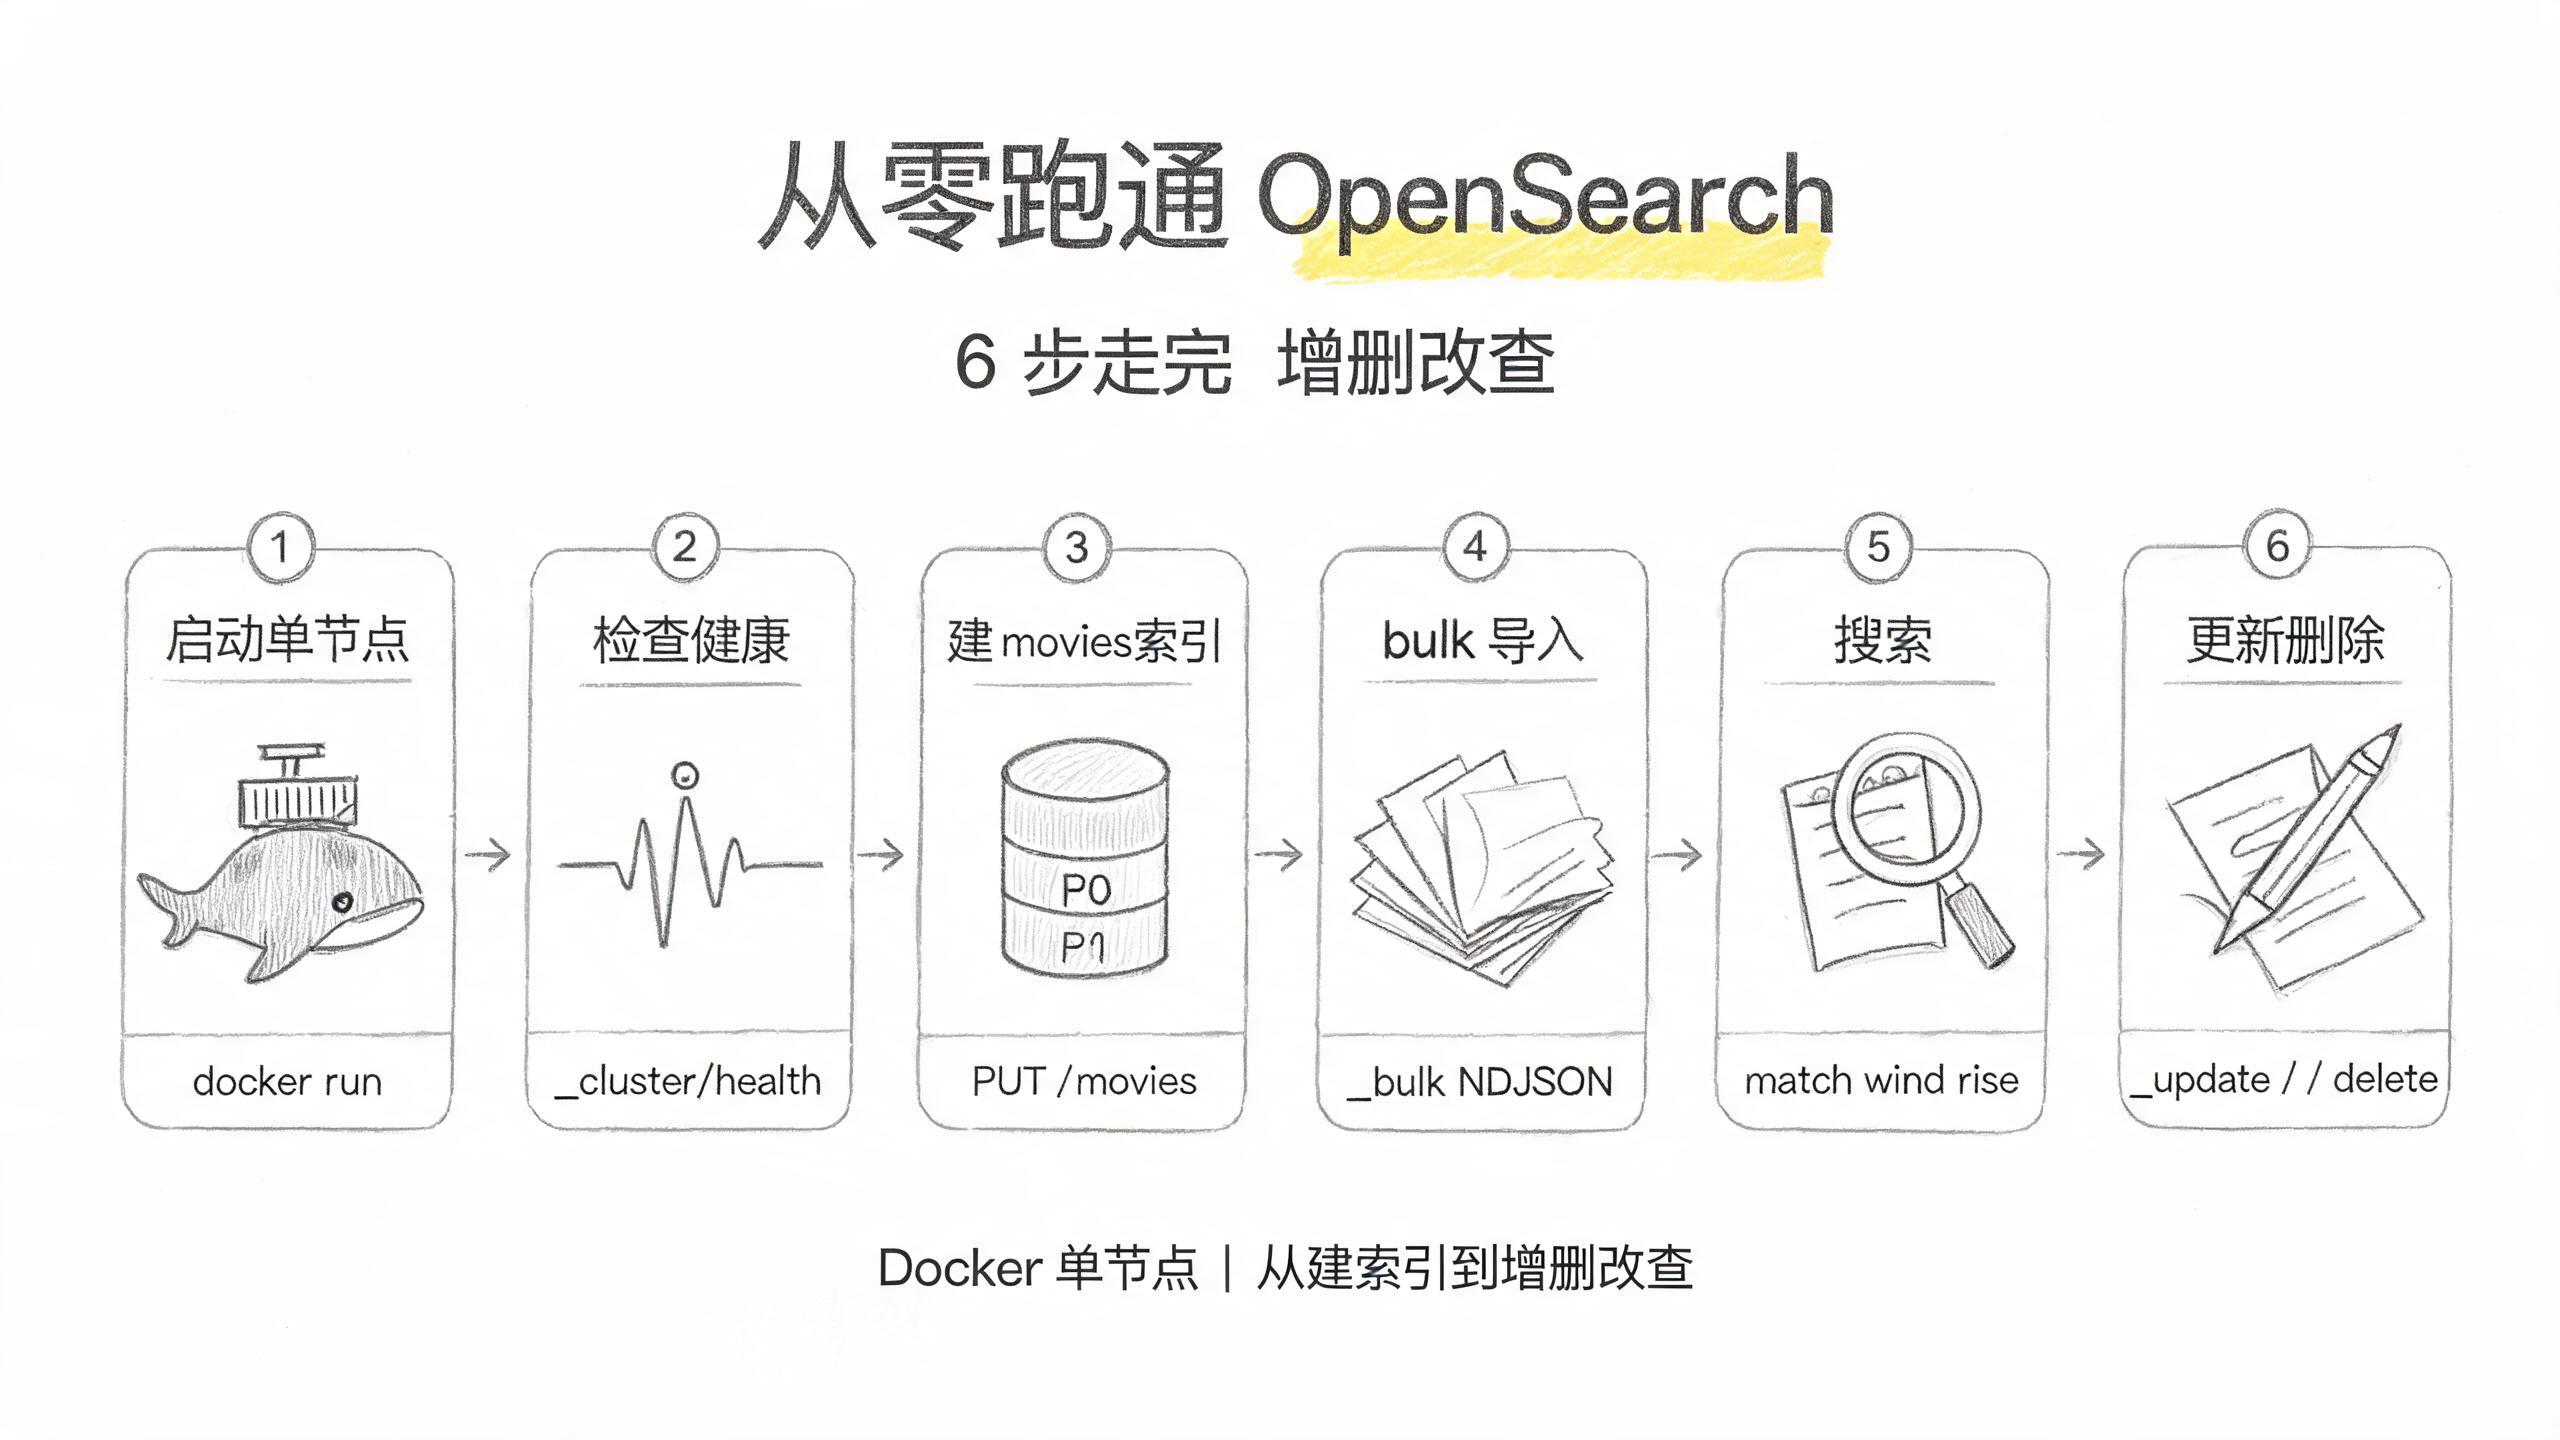
跟着这篇走完,你会在本机用一个 Docker 容器把 OpenSearch 跑起来,然后按 建索引 → 导入 → 搜索 → 改 → 删 的顺序把一套文档操作走一遍,共 6 步,每步都有一条命令能验证自己做对了没有。文中固定用这些值:端口 9200、用户 admin、示例密码 Devfix@2026、索引 movies、5 条电影示例数据;你换了就把示例值替换掉。如果你玩过 从零跑通 Meilisearch 本地搜索服务,这次换个思路:Meilisearch 是开箱即用的轻引擎,OpenSearch 是分片化的重引擎,本地跑法差别不小。
前置条件
| 项 | 要求 | 说明 |
|---|---|---|
| Docker | 任意近期版本 | 本文用 Docker 起服务,这是本地体验 OpenSearch 最省事的方式 |
| 内存 | Docker Desktop 至少 4 GB | OpenSearch 是 JVM 进程,比较吃内存,官方安装文档建议给 Docker Desktop 至少 4 GB |
| 磁盘 | 2 GB 以上空闲 | 官方镜像加上索引数据的余量 |
| Linux 宿主机额外项 | vm.max_map_count=262144 |
Lucene(OpenSearch 底层的搜索库)用内存映射文件,默认值不够;macOS/Windows 的 Docker Desktop 不需要改 |
| curl | 任意版本 | 全文用 curl 调 REST API |
Linux 上先确认一下:
cat /proc/sys/vm/max_map_count小于 262144 就临时调大:
sudo sysctl -w vm.max_map_count=262144第一步:用 Docker 启动单节点
OpenSearch 官方镜像在 Docker Hub,叫 opensearchproject/opensearch。当前 stable 是 3.9.0(2026-09-29 发布),用 latest 标签或写死版本号都行,本文示例用 latest。
启动命令有一个新手必踩的坑先说在前面:OpenSearch 从 1.x 起默认启用 security 插件——它负责登录鉴权,并用 TLS 加密 API 通信,会生成自签证书。而且 2.12 版本之后要求你显式设一个管理员密码,不设密码容器直接退出。所以启动命令必须带 OPENSEARCH_INITIAL_ADMIN_PASSWORD,密码规则是至少 8 位、大小写、数字、特殊字符各至少一个:
docker run -d -p 9200:9200 -p 9600:9600 \
  -e "discovery.type=single-node" \
  -e "OPENSEARCH_INITIAL_ADMIN_PASSWORD=Devfix@2026" \
  opensearchproject/opensearch:latest
discovery.type=single-node 告诉它不用找别的节点,自己就是一个集群——集群是整个搜索服务,节点是其中一个个 OpenSearch 实例,单节点就是一个实例撑起一个集群;9200 是 REST API 端口,9600 是性能分析端口。
容器起来后 JVM 启动要几十秒,先等它就绪。验证:
curl -sk -u admin:Devfix@2026 "https://localhost:9200"{
"name" : "a937e018cee5",
"cluster_name" : "docker-cluster",
"cluster_uuid" : "GLAjAG6bTeWErFUy_d-CLw",
"version" : {
"distribution" : "opensearch",
"number" : "3.9.0",
"minimum_wire_compatibility_version" : "7.10.0",
"minimum_index_compatibility_version" : "7.0.0"
},
"tagline" : "The OpenSearch Project: https://opensearch.org/"
}返回这个欢迎 JSON(实际输出还包含构建信息等字段,这里只列关键项)就说明服务通了。注意 curl 的两个参数:https 和 -k。因为默认开了 TLS,用 http:// 打这个端口最常见的报错是 Empty reply from server;-k 是跳过自签证书校验,本地体验才这么干,生产要换正经证书。这个坑的完整排查见 FAQ 第 1 项。
第二步:检查集群健康
服务通了不代表集群状态好。OpenSearch 用三种颜色表达健康:green 是所有主分片和副本都分配到位;yellow 是主分片都在、副本有缺;red 是连主分片都有缺。查一下:
curl -sk -u admin:Devfix@2026 "https://localhost:9200/_cluster/health?pretty"{
"cluster_name" : "docker-cluster",
"status" : "green",
"timed_out" : false,
"number_of_nodes" : 1,
"number_of_data_nodes" : 1,
"active_primary_shards" : 0,
"active_shards" : 0,
"unassigned_shards" : 0,
"number_of_pending_tasks" : 0
}现在还没有索引,分片数为 0,状态是 green。先记住 yellow 的判定规则,第三步建索引时马上用得上。
第三步:创建 movies 索引
OpenSearch 的数据组织方式是:索引(index)装 JSON 文档(document),每个索引又切成主分片(primary shard)存数据,副本分片(replica shard)做备份。建索引的语法是 PUT /<索引名>,可以同时指定 settings 和 mappings。
关键决策:副本数。index.number_of_replicas 默认是 1,也就是每个主分片配一个副本——但副本必须放在别的节点上才有备份意义,单节点集群放不下,于是分片永远处于未分配状态,集群健康变 yellow。所以本地单节点,建索引时显式把副本设成 0:
curl -sk -u admin:Devfix@2026 -X PUT "https://localhost:9200/movies?pretty" \
  -H "Content-Type: application/json" \
  -d '{
    "settings": {
      "index.number_of_shards": 1,
      "index.number_of_replicas": 0
    },
    "mappings": {
      "properties": {
        "title":  { "type": "text" },
        "year":   { "type": "integer" },
        "genre":  { "type": "keyword" }
      }
    }
  }'
{
"acknowledged" : true,
"shards_acknowledged" : true,
"index" : "movies"
}mappings 是索引里字段的类型清单:title 设成 text,会被分词供全文搜索;year 是整数;genre 设成 keyword,整体当一个值,适合精确过滤。索引名必须全小写,不能以 _ 或 - 开头。
建完再查一次健康,这次带上了索引的分片:
curl -sk -u admin:Devfix@2026 "https://localhost:9200/_cluster/health?pretty"{
"cluster_name" : "docker-cluster",
"status" : "green",
"active_primary_shards" : 1,
"active_shards" : 1,
"unassigned_shards" : 0
}replicas=0 生效,1 个主分片分配到位,没有未分配分片,green。如果你这步建成了 yellow,多半是副本没设 0,见 FAQ 第 2 项。
第四步:bulk 导入 5 条示例数据
一条一条 PUT /movies/_doc/<id> 也能导入,但正式场景都用 _bulk:一个请求塞多条文档,性能高得多。bulk 的请求体是 NDJSON 格式——每行一个 JSON,动作行和文档行成对,整个 body 必须以换行符结尾。手写这个格式最容易翻车,所以先把数据落成一个文件:
cat > movies.ndjson <<'EOF'
{ "index": { "_index": "movies", "_id": "1" } }
{ "title": "Let the Wind Rise", "year": 2013, "genre": "drama" }
{ "index": { "_index": "movies", "_id": "2" } }
{ "title": "Gone with the Wind", "year": 1939, "genre": "drama" }
{ "index": { "_index": "movies", "_id": "3" } }
{ "title": "The Rise of Machines", "year": 2021, "genre": "scifi" }
{ "index": { "_index": "movies", "_id": "4" } }
{ "title": "Deep Sea Chronicles", "year": 2018, "genre": "documentary" }
{ "index": { "_index": "movies", "_id": "5" } }
{ "title": "Windmill Valley", "year": 2015, "genre": "drama" }
EOF
这 5 条数据的 title 是故意设计的:第 1 条同时含 Wind 和 Rise,第 2 条只含 Wind,第 3 条只含 Rise,第 4 条两个都不含,第 5 条的词是 windmill——一个和 wind 完全不同的词。第五步搜索的结果全都能从这份数据本身推出来。
发送 bulk:
curl -sk -u admin:Devfix@2026 -X POST "https://localhost:9200/_bulk?pretty" \
  -H "Content-Type: application/x-ndjson" \
  --data-binary @movies.ndjson
响应很长,只看两个地方:顶层的 "errors" : false,和每个 item 的 "result" : "created":
{
  "took" : 11,
  "errors" : false,
  "items" : [
    {
      "index" : {
        "_index" : "movies",
        "_id" : "1",
        "_version" : 1,
        "result" : "created",
        "status" : 201
      }
    }
  ]
}
(items 里 5 条各一个,这里只展示第一条。)用 count 验证全量:
curl -sk -u admin:Devfix@2026 "https://localhost:9200/movies/_count?pretty"{
"count" : 5,
"_shards" : { "total" : 1, "successful" : 1, "skipped" : 0, "failed" : 0 }
}count 是 5 就对了。如果 bulk 报 400 malformed request,九成是 NDJSON 格式问题:文档 JSON 被换行拆开了,或者 body 结尾少换行符;Content-Type 也要写对。完整排查见 FAQ 第 3 项。
第五步:搜索,看分词怎么工作
数据进去了,现在搜。先试全文搜索,match 查询会对指定字段分词后匹配:
curl -sk -u admin:Devfix@2026 -X GET "https://localhost:9200/movies/_search?pretty" \
  -H "Content-Type: application/json" \
  -d '{ "query": { "match": { "title": "wind rise" } } }'
{
"took" : 2,
"hits" : {
"total" : { "value" : 3, "relation" : "eq" },
"max_score" : 0.5023,
"hits" : [
{ "_id" : "1", "_score" : 0.5023, "_source" : { "title" : "Let the Wind Rise", "year" : 2013, "genre" : "drama" } },
{ "_id" : "3", "_score" : 0.4119, "_source" : { "title" : "The Rise of Machines", "year" : 2021, "genre" : "scifi" } },
{ "_id" : "2", "_score" : 0.3987, "_source" : { "title" : "Gone with the Wind", "year" : 1939, "genre" : "drama" } }
]
}
}为什么命中 3 条而不是 1 条?match 默认把查询串分成 wind 和 rise 两个词,用 OR 组合,所以只含其中一个的也进来了:第 2 条有 wind,第 3 条有 rise;第 1 条两个词都有,分数最高排第一。_score 是相关性得分,具体数值各集群不同,看命中集合和排序就行。第 5 条 Windmill Valley 没命中:分词器把 windmill 切成一整个词,它不是 wind。全文搜索按词匹配,不按子串。
要两个词都命中,加 operator:
curl -sk -u admin:Devfix@2026 -X GET "https://localhost:9200/movies/_search?pretty" \
  -H "Content-Type: application/json" \
  -d '{ "query": { "match": { "title": { "query": "wind rise", "operator": "and" } } } }'
这次只剩第 1 条。
再试一个反直觉的:搜 rises。
curl -sk -u admin:Devfix@2026 -X GET "https://localhost:9200/movies/_search?pretty" \
  -H "Content-Type: application/json" \
  -d '{ "query": { "match": { "title": "rises" } } }'
0 命中。因为默认分析器是 standard,它只切词不做词干还原,rises 和 rise 是两个不同的词。想让 rises 命中含 Rise 的文档,指定 english 分析器——它会去停用词(the、and 这类常见虚词)并做词干化(把 rises 还原成 rise):
curl -sk -u admin:Devfix@2026 -X GET "https://localhost:9200/movies/_search?pretty" \
  -H "Content-Type: application/json" \
  -d '{ "query": { "match": { "title": { "query": "rises", "analyzer": "english" } } } }'
这次第 1、3 条都命中。一条查询三种结果,差别全在分析器。
还有一个刚导入就搜索可能碰到的怪事:OpenSearch 是近实时搜索,文档写入后要等索引 refresh(默认每 1 秒一次)才进入可搜索状态。刚 bulk 完立刻搜,偶尔会少几条,等一秒再搜就齐了。如果你 bulk 完 count 是 5 但搜索 0 hits,见 FAQ 第 4 项。
第六步:更新与删除
改单条文档用 POST /<索引>/_update/<id>,传 doc 做局部更新:
curl -sk -u admin:Devfix@2026 -X POST "https://localhost:9200/movies/_update/4?pretty" \
  -H "Content-Type: application/json" \
  -d '{ "doc": { "year": 2019 } }'
{ "_index" : "movies", "_id" : "4", "_version" : 2, "result" : "updated" }_version 从 1 变 2,result 是 updated。删除更简单:
curl -sk -u admin:Devfix@2026 -X DELETE "https://localhost:9200/movies/_doc/4?pretty"{ "_index" : "movies", "_id" : "4", "_version" : 3, "result" : "deleted" }验证 count 回到 4:
curl -sk -u admin:Devfix@2026 "https://localhost:9200/movies/_count?pretty"到这里,建索引 → 导入 → 搜索 → 改 → 删 全部走通。玩完记得停容器:
docker ps
docker stop <容器ID>
核心概念
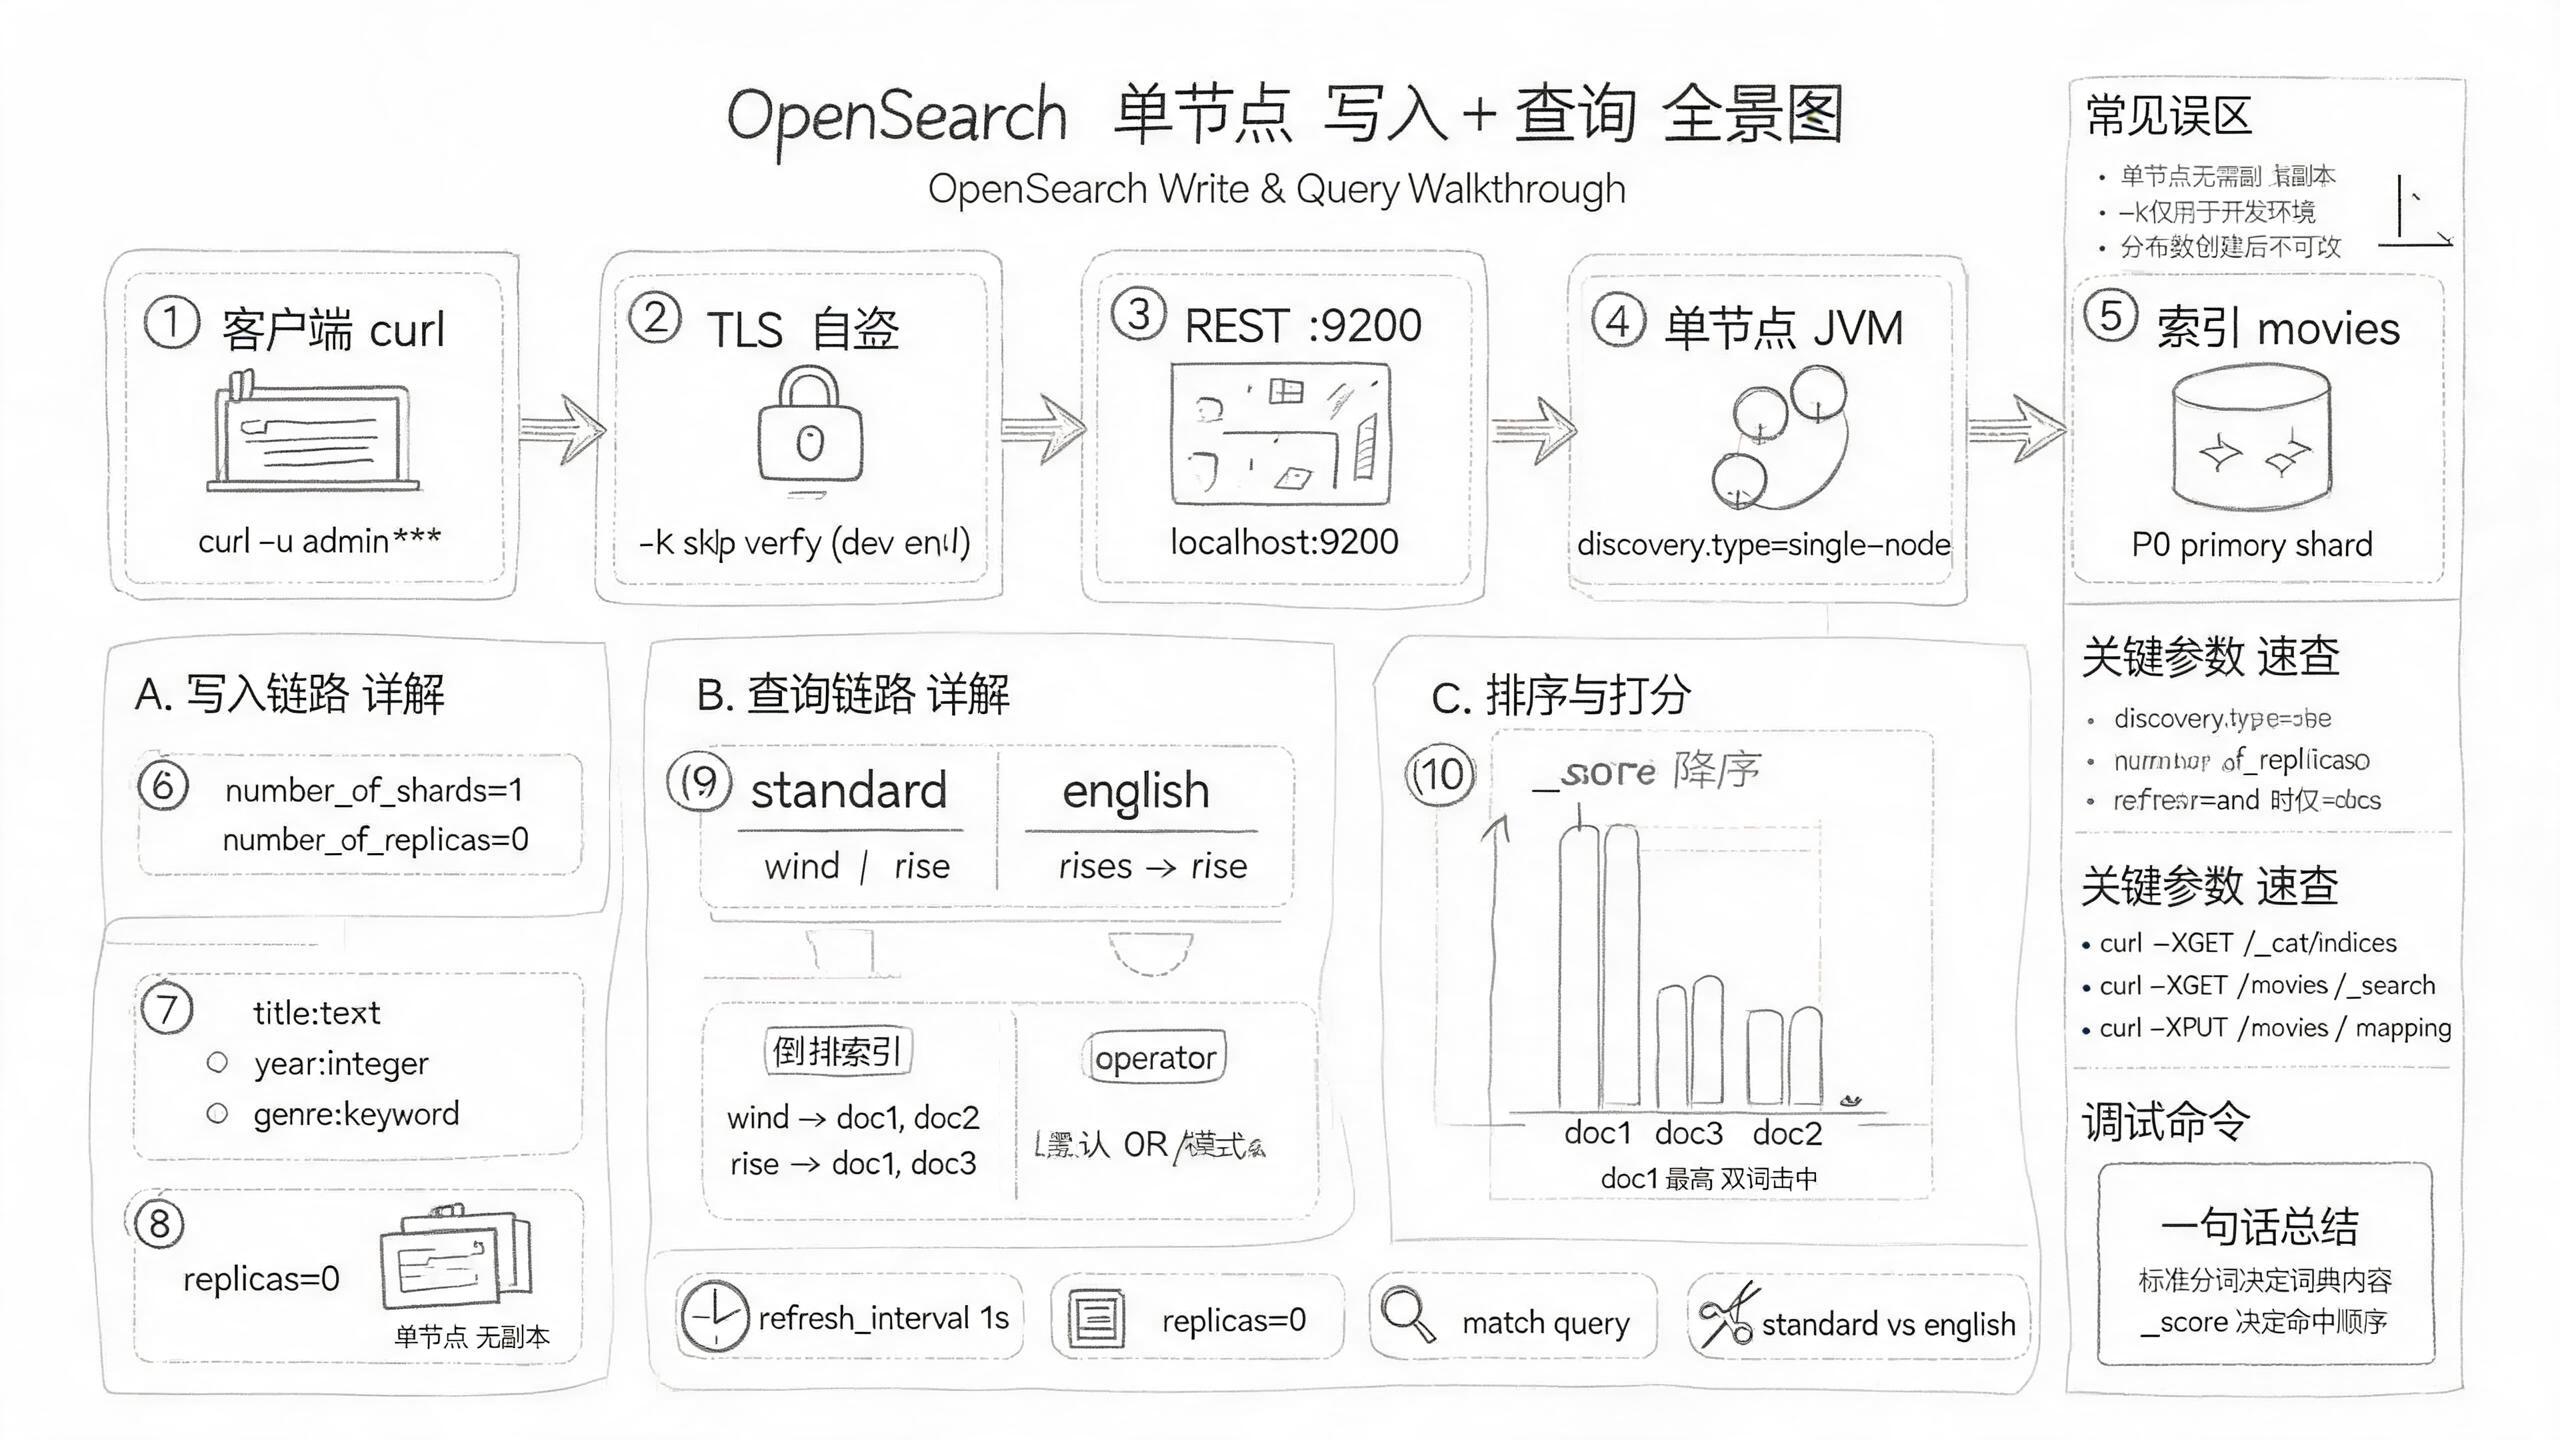
这张全景图走完就清楚了:写入路径是 curl → 9200 → 节点 → movies 索引 → 主分片;查询路径是查询串先过分析器分词,再查倒排索引定位文档。
| 概念 | 是什么 | 类比 |
|---|---|---|
| 集群(cluster) | 一个或多个节点组成的整体,对外只有一个访问地址 | 像一个数据库实例 |
| 节点(node) | 一个 OpenSearch 实例,本文单节点就是一个实例撑全场 | 像实例后面的一台服务器 |
| 索引(index) | JSON 文档的容器,名字全小写,建的时候定 settings 和 mappings | 像数据库里的一张表 |
| 文档(document) | 一条 JSON 记录,_id 唯一标识 |
像表里的一行数据 |
| 分片(shard) | 索引数据的实际存放单元,主分片存数据,副本分片做备份 | 像表分区加主从复制 |
| 分析器(analyzer) | 把文本切成词的组件,standard 只切词,english 还去停用词、做词干化 | 像搜索词的预处理器 |
| 倒排索引 | 分词后生成的「词 → 文档」查找表,搜索真正查的是它 | 像书末尾的主题索引页 |
常见问题
curl 报 Empty reply from server 或 SSL 错误
现象:用 http:// 打 9200 端口时 curl 拿不到合法响应,最常见报 Empty reply from server。
原因:OpenSearch 默认启用 TLS,必须用 https 协议;用 http 协议打 TLS 端口协议栈对不上,连接被直接断开。https 配上 -k(跳过自签证书校验)才能通;生产环境应配置正式证书而不是 -k。
集群健康一直是 yellow
现象:建索引后 _cluster/health 一直返回 status: yellow,unassigned_shards 不为 0。
原因:副本分片未分配——index.number_of_replicas 默认是 1,副本要放在别的节点上才有备份意义,单节点集群放不下。
bulk 请求报 400 malformed request
现象:POST /_bulk 报 400,错误信息含 malformed request 或 expected。
原因:NDJSON 格式不对,三个检查点——每个文档 JSON 必须压成一行;动作行和文档行严格成对;body 结尾必须有换行符(--data-binary @文件 时确保文件以换行结尾)。Content-Type 必须用 application/x-ndjson,不是 application/json。
刚导入的文档搜不到,但 _count 是对的
现象:bulk 完 _count 返回 5,紧接着 _search 返回 0 hits;等 1 秒再搜就齐了。
原因:OpenSearch 是近实时搜索,文档写入后要等索引 refresh(默认每 1 秒一次)才进入可搜索状态。_count 统计的是已写入的文档,搜索查的是已 refresh 的倒排索引——分词后建立的「词 → 文档」查找表。