
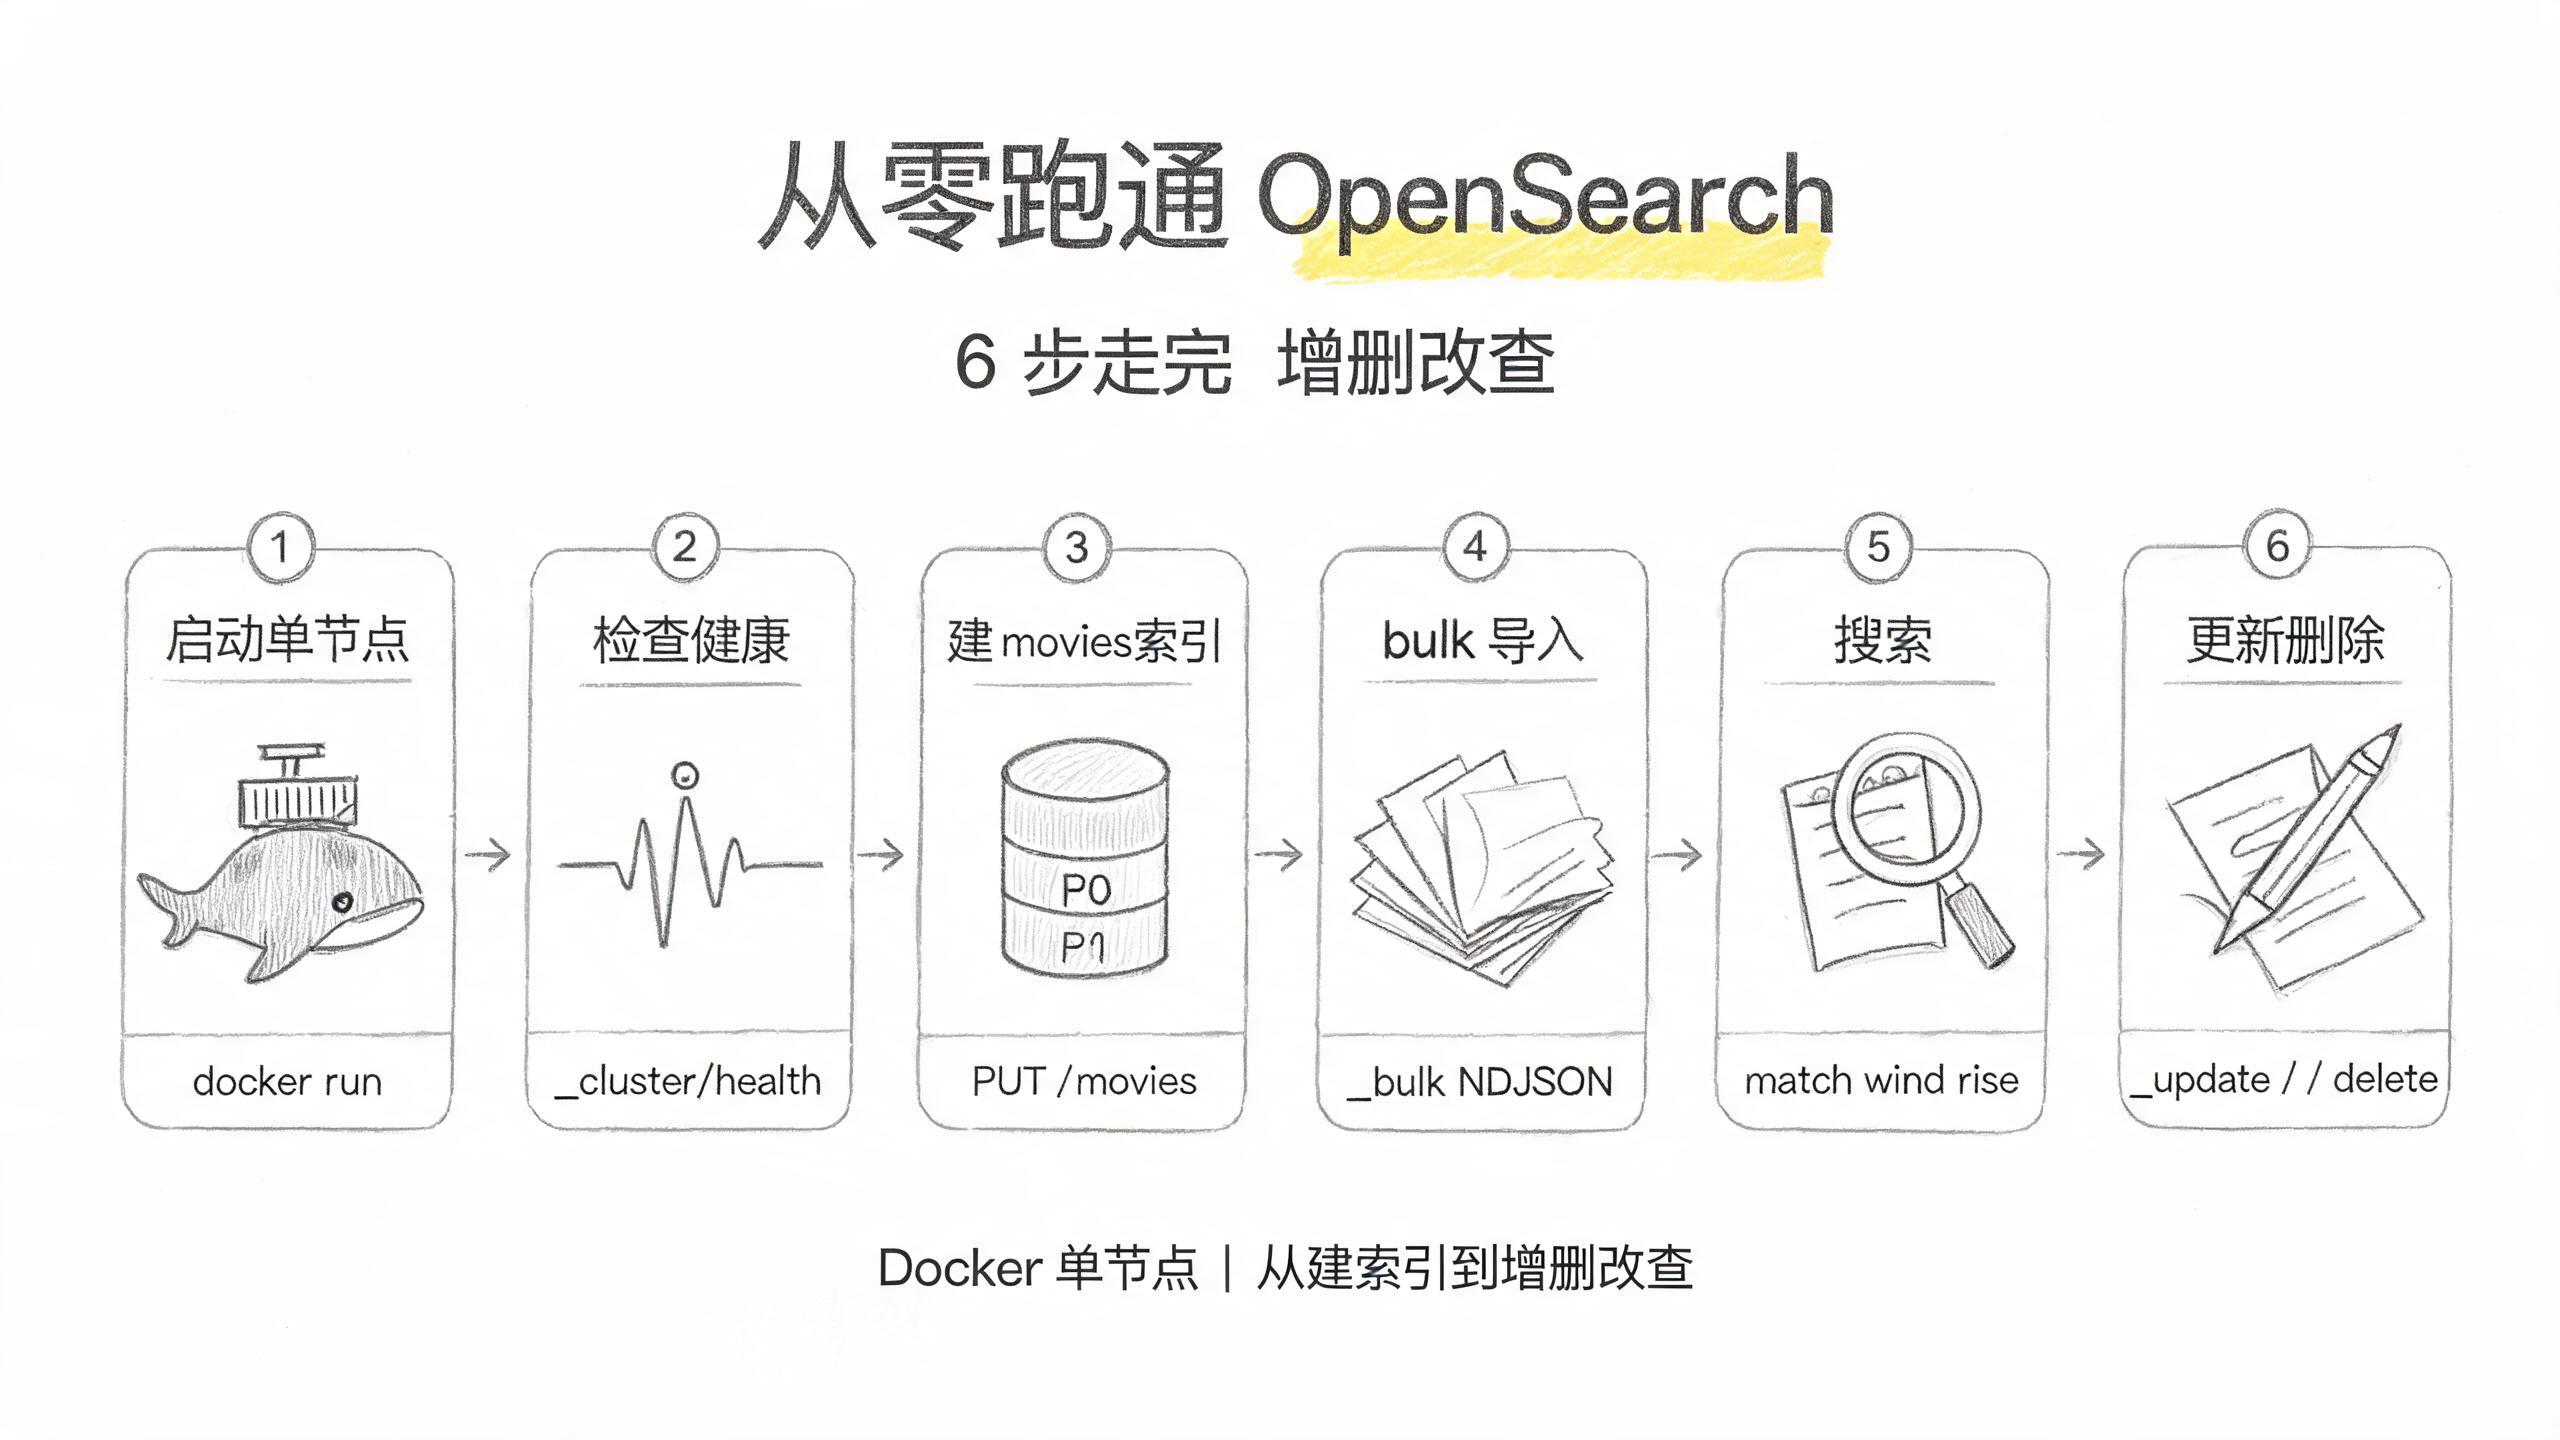
跟著這篇走完,你會在本機用一個 Docker 容器把 OpenSearch 跑起來,然後按 建索引 → 導入 → 搜索 → 改 → 刪 的順序把一套文檔操作走一遍,共 6 步,每步都有一條命令能驗證自己做對了沒有。文中固定用這些值:端口 9200、用戶 admin、示例密碼 Devfix@2026、索引 movies、5 條電影示例數據;你換了就把示例值替換掉。如果你玩過 從零跑通 Meilisearch 本地搜索服務,這次換個思路:Meilisearch 是開箱即用的輕引擎,OpenSearch 是分片化的重引擎,本地跑法差別不小。
前置條件
| 項 | 要求 | 說明 |
|---|---|---|
| Docker | 任意近期版本 | 本文用 Docker 起服務,這是本地體驗 OpenSearch 最省事的方式 |
| 記憶體 | Docker Desktop 至少 4 GB | OpenSearch 是 JVM 進程,比較吃記憶體,官方安裝文檔建議給 Docker Desktop 至少 4 GB |
| 磁盤 | 2 GB 以上空閒 | 官方鏡像加上索引數據的餘量 |
| Linux 宿主機額外項 | vm.max_map_count=262144 |
Lucene(OpenSearch 底層的搜索庫)用記憶體映射文件,預設值不夠;macOS/Windows 的 Docker Desktop 不需要改 |
| curl | 任意版本 | 全文用 curl 調 REST API |
Linux 上先確認一下:
cat /proc/sys/vm/max_map_count小於 262144 就臨時調大:
sudo sysctl -w vm.max_map_count=262144第一步:用 Docker 啟動單節點
OpenSearch 官方鏡像在 Docker Hub,叫 opensearchproject/opensearch。當前 stable 是 3.9.0(2026-09-29 發佈),用 latest 標籤或寫死版本號都行,本文示例用 latest。
啟動命令有一個新手必踩的坑先說在前面:OpenSearch 從 1.x 起預設啟用 security 插件——它負責登錄鑑權,並用 TLS 加密 API 通信,會生成自簽證書。而且 2.12 版本之後要求你顯式設一個管理員密碼,不設密碼容器直接退出。所以啟動命令必須帶 OPENSEARCH_INITIAL_ADMIN_PASSWORD,密碼規則是至少 8 位、大小寫、數字、特殊字符各至少一個:
docker run -d -p 9200:9200 -p 9600:9600 \
  -e "discovery.type=single-node" \
  -e "OPENSEARCH_INITIAL_ADMIN_PASSWORD=Devfix@2026" \
  opensearchproject/opensearch:latest
discovery.type=single-node 告訴它不用找別的節點,自己就是一個集群——集群是整個搜索服務,節點是其中一個個 OpenSearch 實例,單節點就是一個實例撐起一個集群;9200 是 REST API 端口,9600 是性能分析端口。
容器起來後 JVM 啟動要幾十秒,先等它就緒。驗證:
curl -sk -u admin:Devfix@2026 "https://localhost:9200"{
"name" : "a937e018cee5",
"cluster_name" : "docker-cluster",
"cluster_uuid" : "GLAjAG6bTeWErFUy_d-CLw",
"version" : {
"distribution" : "opensearch",
"number" : "3.9.0",
"minimum_wire_compatibility_version" : "7.10.0",
"minimum_index_compatibility_version" : "7.0.0"
},
"tagline" : "The OpenSearch Project: https://opensearch.org/"
}返回這個歡迎 JSON(實際輸出還包含構建信息等字段,這裡只列關鍵項)就說明服務通了。注意 curl 的兩個參數:https 和 -k。因為預設開了 TLS,用 http:// 打這個端口最常見的報錯是 Empty reply from server;-k 是跳過自簽證書校驗,本地體驗才這麼幹,生產要換正經證書。這個坑的完整排查見 FAQ 第 1 項。
第二步:檢查集群健康
服務通了不代表集群狀態好。OpenSearch 用三種顏色表達健康:green 是所有主分片和副本都分配到位;yellow 是主分片都在、副本有缺;red 是連主分片都有缺。查一下:
curl -sk -u admin:Devfix@2026 "https://localhost:9200/_cluster/health?pretty"{
"cluster_name" : "docker-cluster",
"status" : "green",
"timed_out" : false,
"number_of_nodes" : 1,
"number_of_data_nodes" : 1,
"active_primary_shards" : 0,
"active_shards" : 0,
"unassigned_shards" : 0,
"number_of_pending_tasks" : 0
}現在還沒有索引,分片數為 0,狀態是 green。先記住 yellow 的判定規則,第三步建索引時馬上用得上。
第三步:創建 movies 索引
OpenSearch 的數據組織方式是:索引(index)裝 JSON 文檔(document),每個索引又切成主分片(primary shard)存數據,副本分片(replica shard)做備份。建索引的語法是 PUT /<索引名>,可以同時指定 settings 和 mappings。
關鍵決策:副本數。index.number_of_replicas 預設是 1,也就是每個主分片配一個副本——但副本必須放在別的節點上才有備份意義,單節點集群放不下,於是分片永遠處於未分配狀態,集群健康變 yellow。所以本地單節點,建索引時顯式把副本設成 0:
curl -sk -u admin:Devfix@2026 -X PUT "https://localhost:9200/movies?pretty" \
  -H "Content-Type: application/json" \
  -d '{
    "settings": {
      "index.number_of_shards": 1,
      "index.number_of_replicas": 0
    },
    "mappings": {
      "properties": {
        "title":  { "type": "text" },
        "year":   { "type": "integer" },
        "genre":  { "type": "keyword" }
      }
    }
  }'
{
"acknowledged" : true,
"shards_acknowledged" : true,
"index" : "movies"
}mappings 是索引裡字段的類型清單:title 設成 text,會被分詞供全文搜索;year 是整數;genre 設成 keyword,整體當一個值,適合精確過濾。索引名必須全小寫,不能以 _ 或 - 開頭。
建完再查一次健康,這次帶上了索引的分片:
curl -sk -u admin:Devfix@2026 "https://localhost:9200/_cluster/health?pretty"{
"cluster_name" : "docker-cluster",
"status" : "green",
"active_primary_shards" : 1,
"active_shards" : 1,
"unassigned_shards" : 0
}replicas=0 生效,1 個主分片分配到位,沒有未分配分片,green。如果你這步建成了 yellow,多半是副本沒設 0,見 FAQ 第 2 項。
第四步:bulk 導入 5 條示例數據
一條一條 PUT /movies/_doc/<id> 也能導入,但正式場景都用 _bulk:一個請求塞多條文檔,性能高得多。bulk 的請求體是 NDJSON 格式——每行一個 JSON,動作行和文檔行成對,整個 body 必須以換行符結尾。手寫這個格式最容易翻車,所以先把數據落成一個文件:
cat > movies.ndjson <<'EOF'
{ "index": { "_index": "movies", "_id": "1" } }
{ "title": "Let the Wind Rise", "year": 2013, "genre": "drama" }
{ "index": { "_index": "movies", "_id": "2" } }
{ "title": "Gone with the Wind", "year": 1939, "genre": "drama" }
{ "index": { "_index": "movies", "_id": "3" } }
{ "title": "The Rise of Machines", "year": 2021, "genre": "scifi" }
{ "index": { "_index": "movies", "_id": "4" } }
{ "title": "Deep Sea Chronicles", "year": 2018, "genre": "documentary" }
{ "index": { "_index": "movies", "_id": "5" } }
{ "title": "Windmill Valley", "year": 2015, "genre": "drama" }
EOF
這 5 條數據的 title 是故意設計的:第 1 條同時含 Wind 和 Rise,第 2 條只含 Wind,第 3 條只含 Rise,第 4 條兩個都不含,第 5 條的詞是 windmill——一個和 wind 完全不同的詞。第五步搜索的結果全都能從這份數據本身推出來。
發送 bulk:
curl -sk -u admin:Devfix@2026 -X POST "https://localhost:9200/_bulk?pretty" \
  -H "Content-Type: application/x-ndjson" \
  --data-binary @movies.ndjson
響應很長,只看兩個地方:頂層的 "errors" : false,和每個 item 的 "result" : "created":
{
  "took" : 11,
  "errors" : false,
  "items" : [
    {
      "index" : {
        "_index" : "movies",
        "_id" : "1",
        "_version" : 1,
        "result" : "created",
        "status" : 201
      }
    }
  ]
}
(items 裡 5 條各一個,這裡只展示第一條。)用 count 驗證全量:
curl -sk -u admin:Devfix@2026 "https://localhost:9200/movies/_count?pretty"{
"count" : 5,
"_shards" : { "total" : 1, "successful" : 1, "skipped" : 0, "failed" : 0 }
}count 是 5 就對了。如果 bulk 報 400 malformed request,九成是 NDJSON 格式問題:文檔 JSON 被換行拆開了,或者 body 結尾少換行符;Content-Type 也要寫對。完整排查見 FAQ 第 3 項。
第五步:搜索,看分詞怎麼工作
數據進去了,現在搜。先試全文搜索,match 查詢會對指定字段分詞後匹配:
curl -sk -u admin:Devfix@2026 -X GET "https://localhost:9200/movies/_search?pretty" \
  -H "Content-Type: application/json" \
  -d '{ "query": { "match": { "title": "wind rise" } } }'
{
"took" : 2,
"hits" : {
"total" : { "value" : 3, "relation" : "eq" },
"max_score" : 0.5023,
"hits" : [
{ "_id" : "1", "_score" : 0.5023, "_source" : { "title" : "Let the Wind Rise", "year" : 2013, "genre" : "drama" } },
{ "_id" : "3", "_score" : 0.4119, "_source" : { "title" : "The Rise of Machines", "year" : 2021, "genre" : "scifi" } },
{ "_id" : "2", "_score" : 0.3987, "_source" : { "title" : "Gone with the Wind", "year" : 1939, "genre" : "drama" } }
]
}
}為什麼命中 3 條而不是 1 條?match 預設把查詢串分成 wind 和 rise 兩個詞,用 OR 組合,所以只含其中一個的也進來了:第 2 條有 wind,第 3 條有 rise;第 1 條兩個詞都有,分數最高排第一。_score 是相關性得分,具體數值各集群不同,看命中集合和排序就行。第 5 條 Windmill Valley 沒命中:分詞器把 windmill 切成一整個詞,它不是 wind。全文搜索按詞匹配,不按子串。
要兩個詞都命中,加 operator:
curl -sk -u admin:Devfix@2026 -X GET "https://localhost:9200/movies/_search?pretty" \
  -H "Content-Type: application/json" \
  -d '{ "query": { "match": { "title": { "query": "wind rise", "operator": "and" } } } }'
這次只剩第 1 條。
再試一個反直覺的:搜 rises。
curl -sk -u admin:Devfix@2026 -X GET "https://localhost:9200/movies/_search?pretty" \
  -H "Content-Type: application/json" \
  -d '{ "query": { "match": { "title": "rises" } } }'
0 命中。因為預設分析器是 standard,它只切詞不做詞幹還原,rises 和 rise 是兩個不同的詞。想讓 rises 命中含 Rise 的文檔,指定 english 分析器——它會去停用詞(the、and 這類常見虛詞)並做詞幹化(把 rises 還原成 rise):
curl -sk -u admin:Devfix@2026 -X GET "https://localhost:9200/movies/_search?pretty" \
  -H "Content-Type: application/json" \
  -d '{ "query": { "match": { "title": { "query": "rises", "analyzer": "english" } } } }'
這次第 1、3 條都命中。一條查詢三種結果,差別全在分析器。
還有一個剛導入就搜索可能碰到的怪事:OpenSearch 是近實時搜索,文檔寫入後要等索引 refresh(預設每 1 秒一次)才進入可搜索狀態。剛 bulk 完立刻搜,偶爾會少幾條,等一秒再搜就齊了。如果你 bulk 完 count 是 5 但搜索 0 hits,見 FAQ 第 4 項。
第六步:更新與刪除
改單條文檔用 POST /<索引>/_update/<id>,傳 doc 做局部更新:
curl -sk -u admin:Devfix@2026 -X POST "https://localhost:9200/movies/_update/4?pretty" \
  -H "Content-Type: application/json" \
  -d '{ "doc": { "year": 2019 } }'
{ "_index" : "movies", "_id" : "4", "_version" : 2, "result" : "updated" }_version 從 1 變 2,result 是 updated。刪除更簡單:
curl -sk -u admin:Devfix@2026 -X DELETE "https://localhost:9200/movies/_doc/4?pretty"{ "_index" : "movies", "_id" : "4", "_version" : 3, "result" : "deleted" }驗證 count 回到 4:
curl -sk -u admin:Devfix@2026 "https://localhost:9200/movies/_count?pretty"到這裡,建索引 → 導入 → 搜索 → 改 → 刪 全部走通。玩完記得停容器:
docker ps
docker stop <容器ID>
核心概念
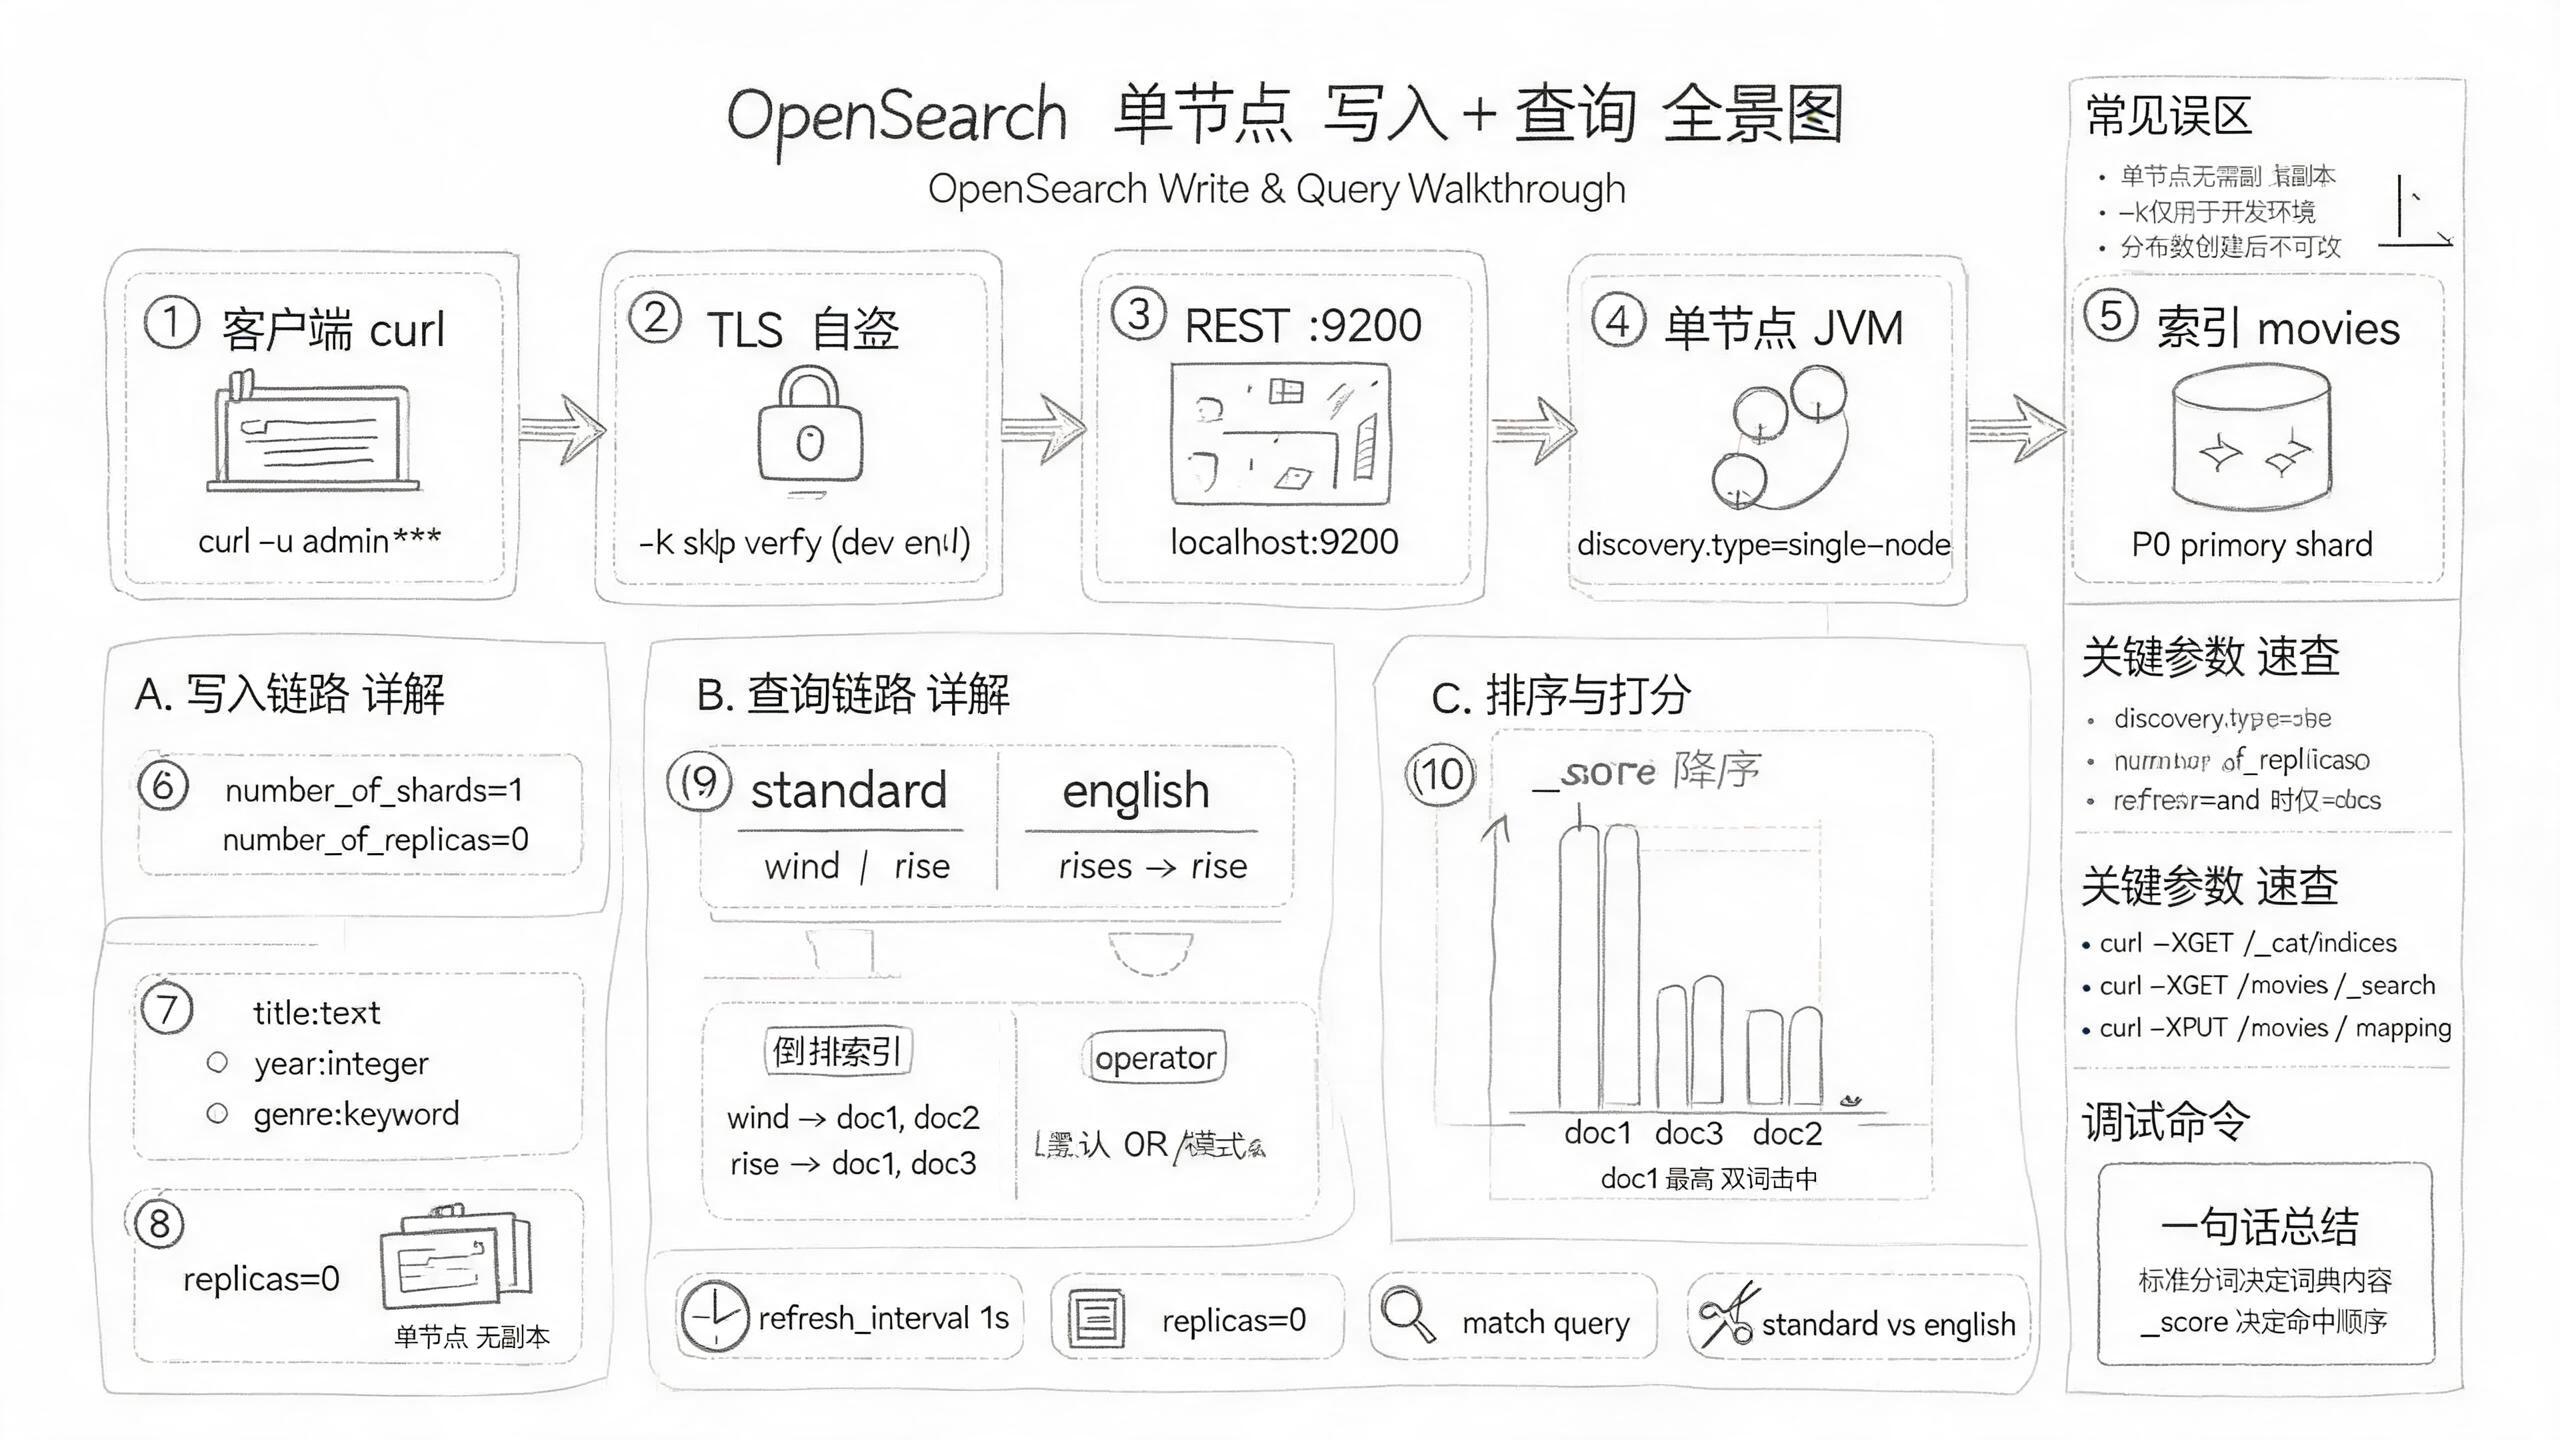
這張全景圖走完就清楚了:寫入路徑是 curl → 9200 → 節點 → movies 索引 → 主分片;查詢路徑是查詢串先過分析器分詞,再查倒排索引定位文檔。
| 概念 | 是什麼 | 類比 |
|---|---|---|
| 集群(cluster) | 一個或多個節點組成的整體,對外只有一個訪問地址 | 像一個數據庫實例 |
| 節點(node) | 一個 OpenSearch 實例,本文單節點就是一個實例撐全場 | 像實例後面的一臺服務器 |
| 索引(index) | JSON 文檔的容器,名字全小寫,建的時候定 settings 和 mappings | 像數據庫裡的一張表 |
| 文檔(document) | 一條 JSON 記錄,_id 唯一標識 |
像表裡的一行數據 |
| 分片(shard) | 索引數據的實際存放單元,主分片存數據,副本分片做備份 | 像表分區加主從複製 |
| 分析器(analyzer) | 把文本切成詞的元件,standard 只切詞,english 還去停用詞、做詞幹化 | 像搜索詞的預處理器 |
| 倒排索引 | 分詞後生成的「詞 → 文檔」查找表,搜索真正查的是它 | 像書末尾的主題索引頁 |
常見問題
curl 報 Empty reply from server 或 SSL 錯誤
現象:用 http:// 打 9200 端口時 curl 拿不到合法響應,最常見報 Empty reply from server。
原因:OpenSearch 預設啟用 TLS,必須用 https 協議;用 http 協議打 TLS 端口協議棧對不上,連接被直接斷開。https 配上 -k(跳過自簽證書校驗)才能通;生產環境應設定正式證書而不是 -k。
集群健康一直是 yellow
現象:建索引後 _cluster/health 一直返回 status: yellow,unassigned_shards 不為 0。
原因:副本分片未分配——index.number_of_replicas 預設是 1,副本要放在別的節點上才有備份意義,單節點集群放不下。
bulk 請求報 400 malformed request
現象:POST /_bulk 報 400,錯誤信息含 malformed request 或 expected。
原因:NDJSON 格式不對,三個檢查點——每個文檔 JSON 必須壓成一行;動作行和文檔行嚴格成對;body 結尾必須有換行符(--data-binary @文件 時確保文件以換行結尾)。Content-Type 必須用 application/x-ndjson,不是 application/json。
剛導入的文檔搜不到,但 _count 是對的
現象:bulk 完 _count 返回 5,緊接著 _search 返回 0 hits;等 1 秒再搜就齊了。
原因:OpenSearch 是近實時搜索,文檔寫入後要等索引 refresh(預設每 1 秒一次)才進入可搜索狀態。_count 統計的是已寫入的文檔,搜索查的是已 refresh 的倒排索引——分詞後建立的「詞 → 文檔」查找表。